• Replacing Parts of Extrusion Head

    4/17/24
    Long gap in posting due to working other jobs and lack of time to spend on LDM printer.

    As a result, this week when I decided to get it going again, I took apart the extrusion head and realized I had not cleaned it properly to leave it idle. :-/

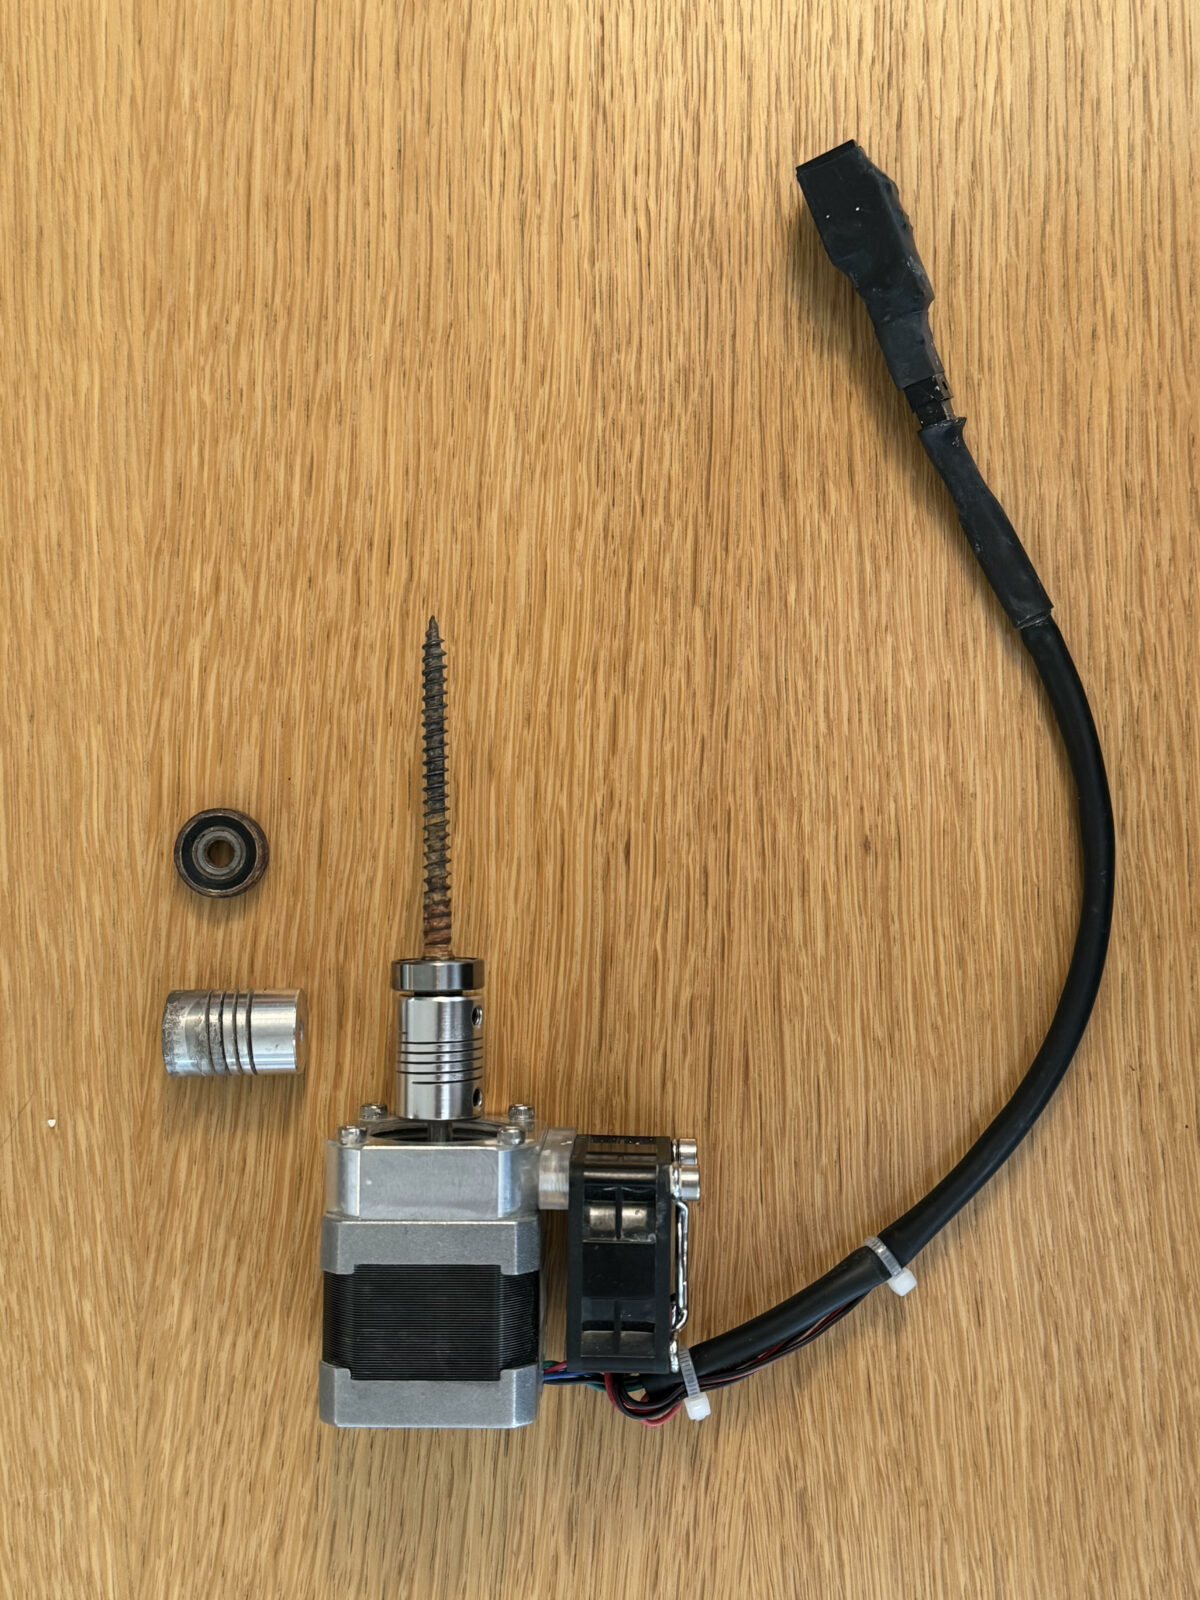
    Unscrewing the printed plastic portion from the stepping motor portion I found that the auger screw was stuck in the plastic housing. With some fuss I was able to remove the plastic portion but in doing so I stretched the aluminum spring that connects the auger to the motor.

    I’m replacing this piece, called…
    “5mm to 6mm Shaft Coupling 25mm Length 18mm Diameter Aluminum Alloy Coupler”
    I actually ended up changing this again, as the auger side did not need the 6mm diameter, and in hopes to keep everything even more on axis I bought a similar coupler…
    “5mm to 5mm Shaft Coupling 25mm Length 18mm Diameter Aluminum Alloy Coupler” 

    and also replacing the bearing that lives on the screw below the coupler…
    “6mm Bore ID, 19mm OD, 6mm Width Pre-Lubricated High Speed Sealed Miniature Bearings”

  • Stilt Table

    Bent Wood Foot
    Burns Office - Stilt Table - Bent Wood Foot - 2023

  • 10/01

    Printed “cloth” form.
    This is the first print exported direct to .STL from Blender, previously I had been exporting as .OBJ and post processing in Rhino. I clipped the bottom of the shape with the Cura positioning and decided (as the prior tall bubble vase collapsed) that I would print as high as I thought it could before collapsing and manually cut off the print.

    Print worked pretty well, but I stopped it at around 50% which was about 4.5″ tall, lines were getting a little thin, and I thought that the print might fail. However a few days after this print I realized (thought) I have run out of clay in the canister again. Perhaps I could have printed this shape taller with a proper flow.

    I am still interested in getting larger pieces and since I don’t have a thicker nozzle, and I want more clay for strength purposes, I plan on doing more investigating into double wall printing.

  • 9/29

    2nd print of bubble form. First time it collapsed at around 70%
    Printed this one to 50% and its beginning to show signs of collapse and increase in air bubbles, stopped print.

  • 9/25

    First round of prints with new harness. Printed first shape (from 9/02) and tall and wide variations.
    Burns Office Vessel

    First attempt at printing directly on to rolled clay bottom
    1st printed ok
    2nd (tall var) printed ok at first but had some buildup on head, I paused and used the resurrection option for the first time, and the print restarted very cleanly. Impressed.
    Burns Office Vessel

    3rd (wide var) failed as the hose pulled out of the printhead and into the piece

    Base shows signs of delamination, needs more research.

  • 2023-0924 New Harness for Canister

    I dont have a stand for my canister, and Ive noticed that with larger prints the canister really needs to move a little or else the nylon hose will crimp. So I’ve designed a harness to fit around the canister which I can hang from a rafter. This will allow for the movement as the print is going and also it orients the out hole down, which is helpful in case I have any more dramatic disconnects of the tube from the canister, all mess will go down.

    2pc, one strap with a hook hangs from joist, the other zips onto the canister and hangs from the hook.

    WASP LDM CHAMBER HARNESS SKETCH - T BURNS
  • Week 38

    I’ve been having some issues with the rear carriage. Sometime last week it was so loose in the track that it fell loose while printing. Haha, yikes. I’ve researched about how to get it in and adjust it using the eccentric nut on one of the wheels. This fixed it part way, but after I found I was having troubles with the parking action being too tight. This was causing the head to be pulled right as it began its decent, thus loosing the correct Max Z value. I adjusted this nut on the rear carriage, and really happy with how much more smooth its going.

    I printed a test at near max diameter.
    Major warping during dry
    Diameter Test

    Only printed half as I was having to hold the canister and move it towards and away from the printer depending on where the head was printing. I will fix this by creating a rig and hanging the canister.

  • 9/18

    Tall twisting oval “particle” vessel
    65psi, 30 min

    This one didnt have the UV map for density distribution.
    Also, the center body was offset so there should be no instance which has a 90deg from main surface

    Printed great.

    Particle Vase
    Particle Vase
  • 9/15

    2nd Particle Vase

    Tallest, longest print yet.
    1st half printed well, second half with bubbles.

    First takeaways from both this and 9/13 shapes are that the size of the geometry and the angle at which it emerges from main body cause some small holes at shelfs.

    Also, I intentionally faceted the main body, but with this number of faces it looks like a mistake.
    Particle Vase
    Particle Vase

  • Week 37

    Canister ran out of clay for the first time.
    Re-wet next amount, load following day etc. Working on technique to load, still hard to minimize air bubbles. 1st time I placed the clay on the board and shoved canister down onto it, this worked well, but when I inverted the canister all the clay slid to the other end, maybe too much silicone lubricant? This time I clumped balls together and dropped them down the canister, not great, still clearly a lot of air.

    After this I was printing at 80psi, and printed a great print (9/13), but 5min into the following print the push to connect at the exit of the canister failed, and the full amount of the clay blew out and shot across the room. Big mess. Probably pushing it too much with the pressure, needed at first but could have turned down. Really the problem was the chewed up end of the 12mm hose and the push to connect lost grip. Cut off end and works fine. Will order new tubing via McMaster.

    Reloaded canister (using load edge and push to back technique seen in early JK video) and now running at around 60-65 psi. Working pretty well.

    I took these dimensions so I could calculate how much clay will fit into the canister…
    Canister tube OD 115mm, ID 110mm, L 390mm
    Piston “Puck” – L 28mm

    Wasp LDM Canister
    The above image shows the canister with both lids off of each end and the piston puck visible. The lid on the right has a 6mm push to connect to 1/4″ NPT thread. Next to it is a blow off valve, I manually adjusted this valve to vent at around 7.5 bar.

    Wasp LDM Canister
    The above image shows the ‘out’ end of the canister which has a 12mm push to connect, I don’t know what threading this has, as it came from wasp and at this point in the line I didn’t need to replace any further connections.


  • 9/13

    1st and 2nd “Particle” Vessel – Low Poly shape with randomly distributed instances of basic geometric shapes using UV map for density control.

    Particle Vase
    Particle Vase
  • 9/12

    Two bodies which meet and join at z>0
    Joining Bodies Test
    Joining Bodies Test

    Seam super visible, needs adjustment